Friday 6 April 2018

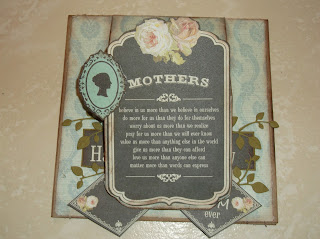
EASEL CARD -the centre step easel (class tutorial)

1.As in the basic easel,divide your 12 x 12 card stock in half.You can make 2 cards from 1 sheet using this method. 2.Trim about 2 mm off all sides of your patterned paper and cover your card,front and back.3.score well

Choose what you would like as your card front.You can use a die cut backed onto card stock or like me,I chose a journalling card cut out from my patterned paper....1.There are no set measurements to this part as you take what you want and lay it in the middle 2.draw a pencil line on either side of your piece.3.Now cut 2 lines using a craft knife all the way from the top to the bottom..4.Fold the middle part of the front downwards.5.Glue the 2 side pieces down to your card,you should only have the centre piece that is folded(refer to picture)

Once again,as in the basic card,create a dimensional stopper for your card to rest on,using foam squares or cardboard.decorate as you like


Inside

elements i added cut out from the patterned paper or use stamps

Closed

from the side

the paper I used

http://www.faerienice.com/435473956/product/3354390/kraft-essentials-plain-cardstock?catid=1178571

No comments:

Post a Comment